Update 05/8/17, a lot of work has been passed across the benchtop. Current position now.
Mig Ammo pigments used on the fenders and upper hull with detail chipping with oil paints.The Dragon Panzer 3 will be subdued a little further . Realism in depth.
Weathering in progress
Before Weathering
Ammo primer with Humbrol paints used to show variation against the Mig Ammo Paints used on the tractor and trailer.
The Travel box is made for going to the Model Expo in Melbourne next year 2018, well, hopefully that is the aim.
Work was delayed as a new paint station was to be put in place
before
After
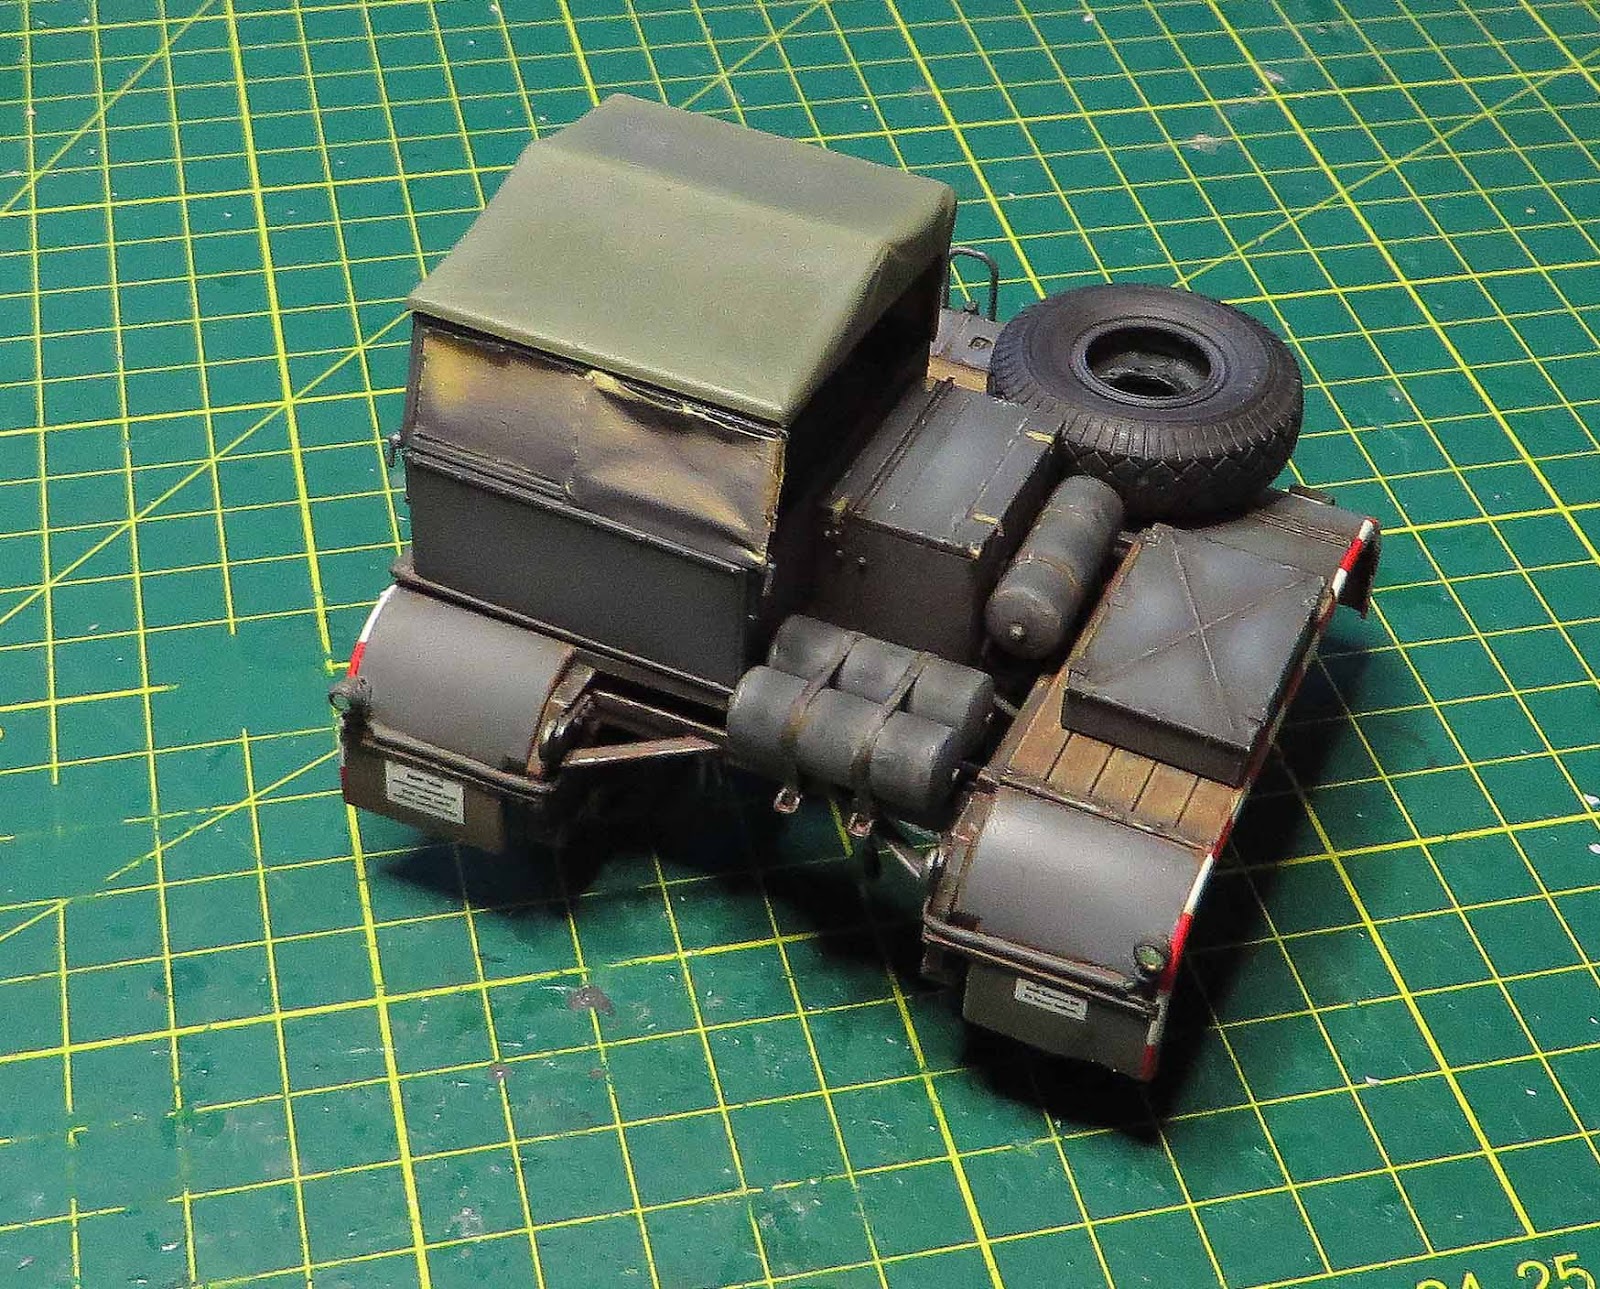
Famo size
The cab is on and figures are in place, further weathering to be made around the lower half of the tractor.
Have been slightly distracted with commencing a Takom King Tiger diorama here
http://www.armorama.com/modules.php?op=modload&name=SquawkBox&file=index&req=viewtopic&topic_id=257763
Hello again,
Wow , time fly's when your having fun.Here is the current update to what seems to be the never ending journey.
This blog was placed on the back foot due to posting in various modelling forums.
Here is where I bombard the blog with the photo's of the work that has carried on since September 2014 to present day.
It's a slow build and I think the end will be this year .
Here is where I am now , the driver has had his hands glued into position.With some of the crew test fitted into position.2 more figures to have resin hands glued on and painted with oil paints.
The figures in the example image will be removed with further detailing till I am happy with the final result.
 |
| Driver's hands glued into correct position holding steering wheel.Crew figures test fitted in back seat. |
The famo has been detailed and is together on the chassis in sub sections for ease of painting and detailing.Further work will be added , i,e: washes chipping unit markings...etc
The plastic rifle racks have been removed and replaced with Aber photo etch rifle brackets.The hardest part of the build.Not for the feint hearted. Persistance is needed in this area as the clamps are very fragile to work with.
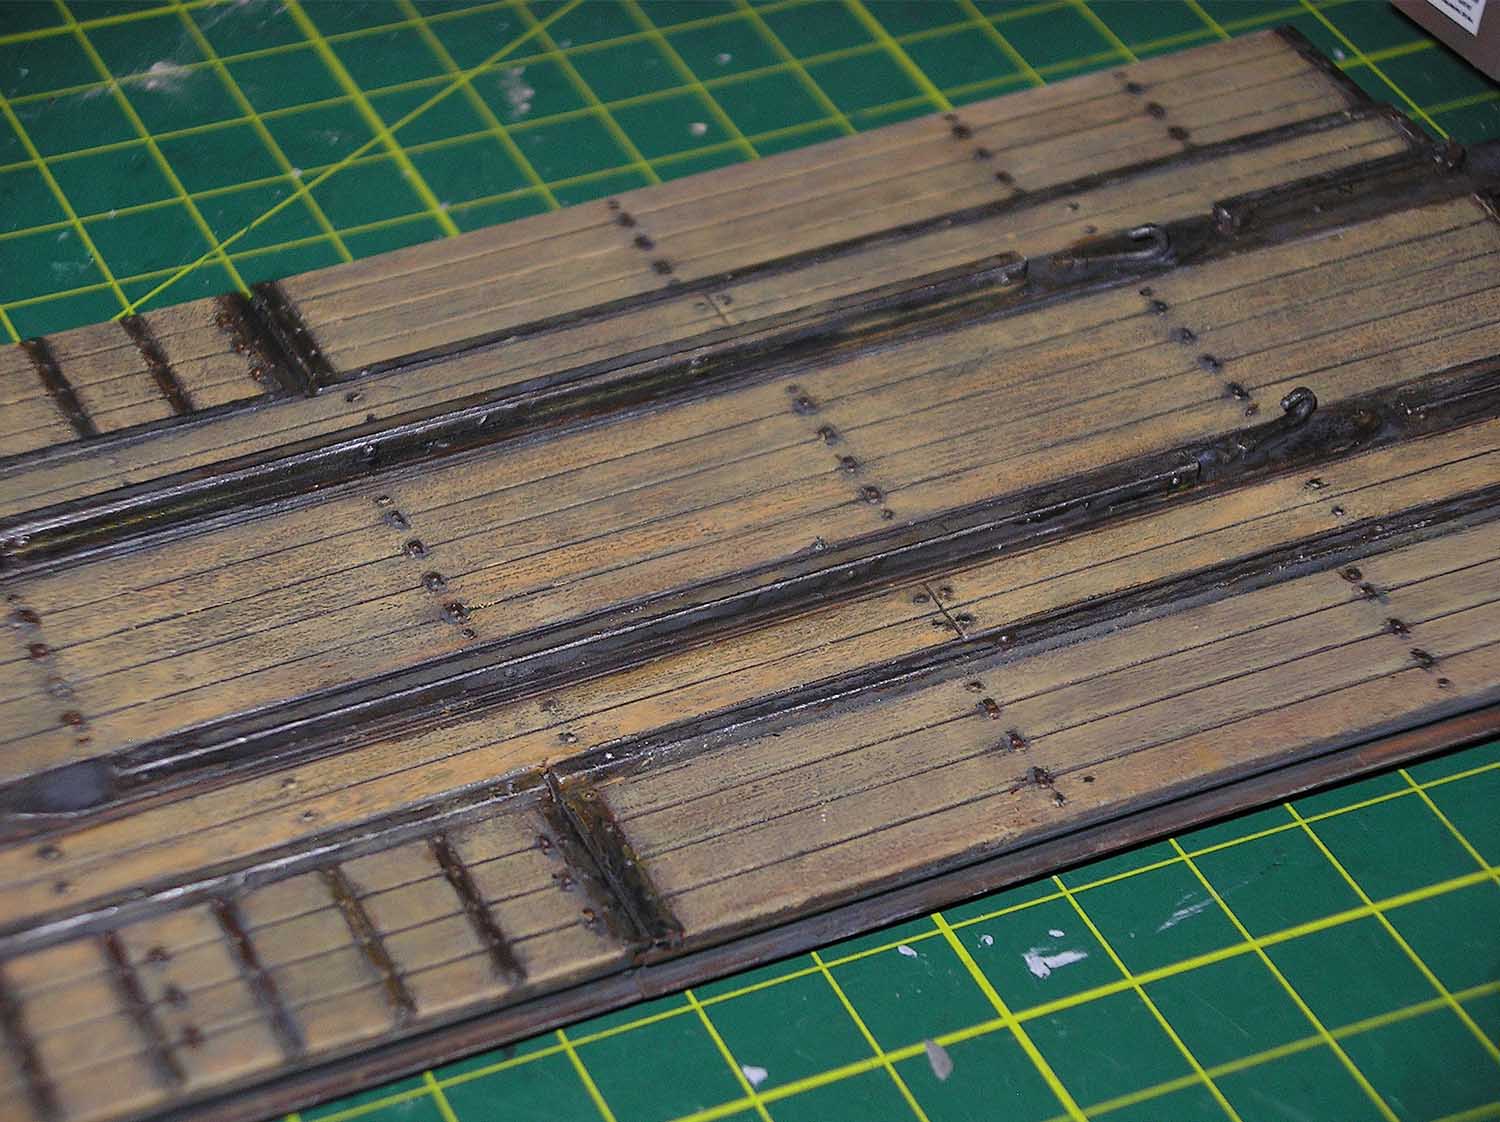
The floor was weathered with Ammo earth pigments , thinned with Ammo thinner and applied with a fine brush.
The seats had been painted with Humbrol enamel and the dry brushed with Acrylics.Fine sandpaper was used to wear the acrylic away from the edges.
Test fitted the layout of tractor and trailer and it is huge.
 |
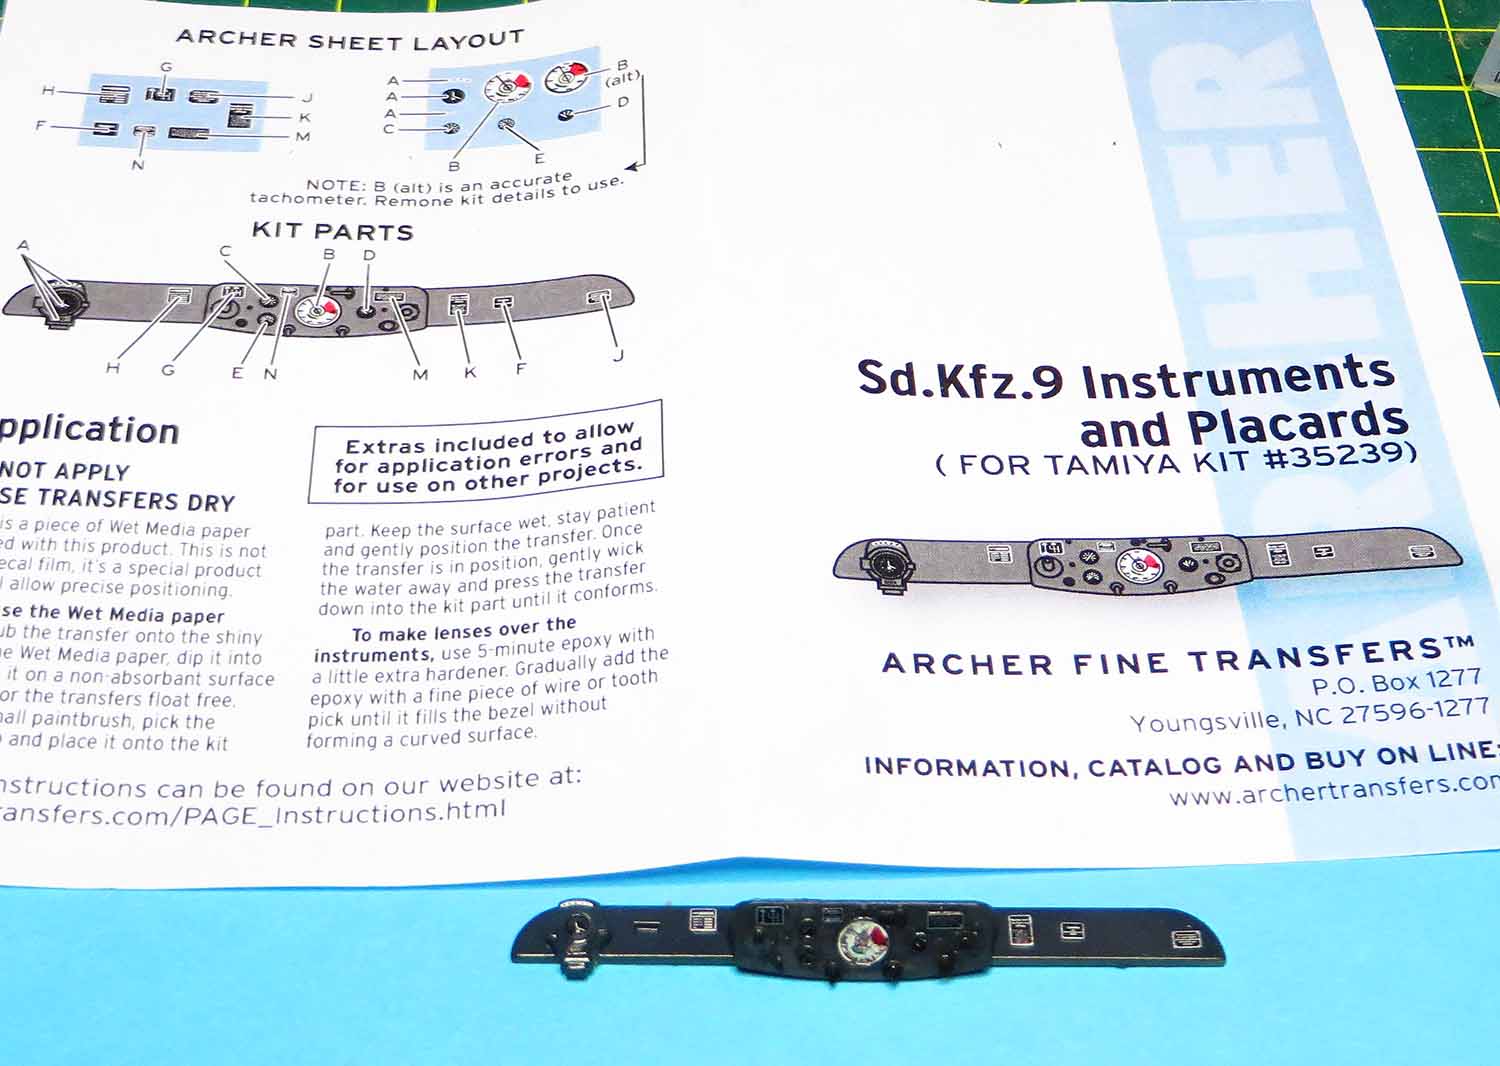
| Archer Decals |
 |
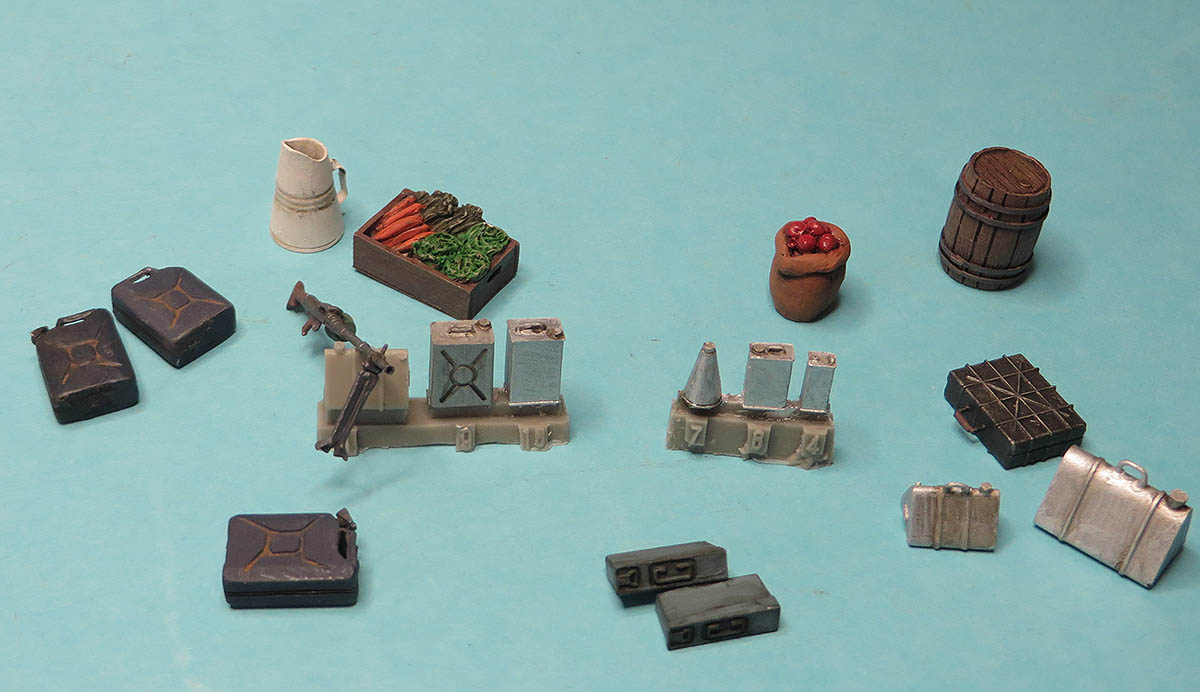
| Accessories to go in the back of cargo compartment |
 |
| Painted with Humbrol enamels |
 |
| test fit of complete assembly |
 |
| Weathered trailer and chassis |
The weathered chassis before the cab and cargo compartments are glued in place
 |
| Test fitted rear crew into cargo bay |
 |
| crew to go in back of Famo |
 |
| Aber etch for Engine side panels |
Originally started with using plastic track from the kit .The weight of the resin load ,crew and top crew cabs may have placed a strain on the plastic track if I glue the tractor to a timber board the strain on the plastic track may have been too much. The Fruil white metal track was the right choice for the replacement track.Can take a lot of punishment and has that little extra detail and with wire inserts will not come apart.
 |
| Ammo tyre colour painted track pads |
Here is the Fruil track where the wire is wrong and has been inserted all the way through.After posting this image the brass rod is meant to be inserted into 1 side and is stopped at the opposite end of the track by the bolt head.This is the way not to do it, I learnt my lesson.
 |
Humbrol 160 track colour painted on the inside of the track
|
Gunze acrylic dark iron used on the outside of
Famo track .Then lightly brushed with a paint brush to bring the steel appearance out
 |
| Test fit of load in rear cargo |
Plus models released an excellent fuel can set complete with decals.These will be added around the rear load and trailer .
 |
| Weathered underside with Mig Ammo Pigments mixed with Tamiya Earth Effects |
 |
| Ammo colours used for tray |
 |
| Ammo Colours used |
 |
| Primed with Ammo primer |
 |
| Ready for paint. |
 |
progress image of weathered trailer and Panzer 3
|
 |
| test fit of ramps and spare tyre |
 |
| Weathered with Mig Ammo pigments , Humbrol and Ammo acrylics |
 |
| items used for tyres |
 |
| Tank workshop products all in 1 set |
 |
| Weathered plastic |
 |
| Items used to weather the plastic |
 |
Standard application tools to apply decals, tissue paper not shown in image but its used to soak up excess water.
1/Airbrush Testers gloss coat to area where decal is to be applied.
2/ Use Mr Mark softer on decal once applied onto surface
3/ Use tissue paper to soak up excess water
4/ Tester Flat clear is airbrushed over decal to blend decal in and remove shine


 |
 |
| Painted and minor weathering |
 |
| Ammo Primer used on Cromwell Resin parts and trailer |
 |
Detailing the trailer sub assembly |
 |
| Drivers position painted in Ammo acrylics |
 |
| removing sink marks and adding Aber etch |
 |
| Eduard etch enhancements |
 |
| The start of the trailer |
Till next time
Michael